

tvfacb.over-blog.com/
24 Janvier 2021

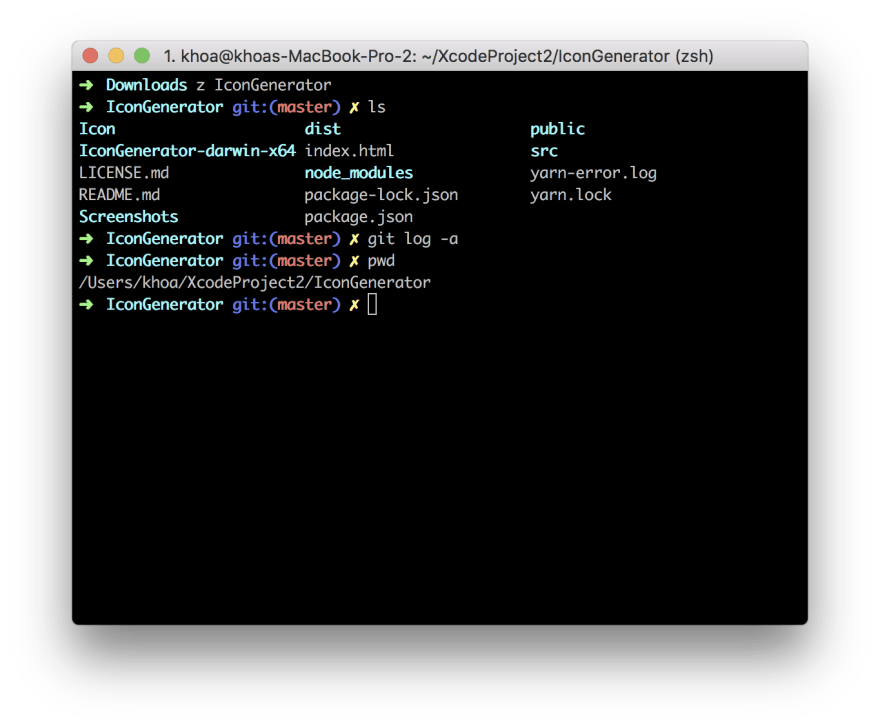
Installs Command Line Tools, Homebrew, iTerm2, Fish, Fisher. Installs Material Design color preset for iTerm2 and patched Meslo Nerd Font. Theme bobthefish, which is based on popular agnoster. Completions for brew, git,./nodemodules/.bin and others Installs a lot of useful plugins for Fish Shell. Set up Git and customise iTerm2 to display the current branch with fancy colours Git is an excellent distributed version control system for your projects projects. To download Git and learn how to install and set up, go here. Oh-My-Zsh is an open source, community-driven framework for managing your ZSH configuration. It comes bundled with a ton of helpful functions, helpers, plugins, themes and a few things that make.
Download, unzip and drag to your Applications directory.
brew install fish
echo '/usr/local/bin/fish' | sudo tee -a /etc/shells
iTerm2 > Preferences > Profiles > General > Basics / Name: fish > Command: /usr/local/bin/fish
Restart iTerm2
curl -L https://github.com/oh-my-fish/oh-my-fish/raw/master/bin/install | fish
omf install agnoster

Restart iTerm2
git clone https://github.com/powerline/fonts.git --depth=1
cd fonts
./install.sh
cd .
rm -rf fonts
iTerm2 > Preferences > Profiles > Text > Font > Change Font > 14pt Meslo LG M Regular for Powerline
Restart iTerm2
Save Link As . > https://raw.githubusercontent.com/mbadolato/iTerm2-Color-Schemes/master/schemes/Solarized%20Dark%20-%20Patched.itermcolors
Double Click
iTerm2 > Preferences > Profiles > Colors > Color Presets > Solarized Dark - Patched
Restart iTerm2
| Function | Shortcut |
|---|---|
| New Tab | ⌘ + T |
| Close Tab or Window | ⌘ + W (same as many mac apps) |
| Go to Tab | ⌘ + Number Key (ie: ⌘2 is 2nd tab) |
| Go to Split Pane by Direction | ⌘ + Option + Arrow Key |
| Cycle iTerm Windows | ⌘ + backtick (true of all mac apps and works with desktops/mission control) |
| Splitting | |
| Split Window Vertically (same profile) | ⌘ + D |
| Split Window Horizontally (same profile) | ⌘ + Shift + D (mnemonic: shift is a wide horizontal key) |
| Moving | |
| Move a pane with the mouse | ⌘ + Alt + Shift and then drag the pane from anywhere |
| Fullscreen | |
| Fullscreen | ⌘+ Enter |
| Maximize a pane | ⌘ + Shift + Enter (use with fullscreen to temp fullscreen a pane!) |
| Resize Pane | Ctrl + ⌘ + Arrow (given you haven't mapped this to something else) |
| Less Often Used By Me | |
| Go to Split Pane by Order of Use | ⌘ + ] , ⌘ + [ |
| Split Window Horizontally (new profile) | Option + ⌘ + H |
| Split Window Vertically (new profile) | Option + ⌘ + V |
| Previous Tab | ⌘+ Left Arrow (I usually move by tab number) |
| Next Tab | ⌘+ Right Arrow |
| Go to Window | ⌘ + Option + Number |
| Function | Shortcut |
|---|---|
| Move back one character | Ctrl + B |
| Move forward one character | Ctrl + F |
| Delete current character | Ctrl + D |
| Delete previous word (in shell) | Ctrl + W |
A lot of shell shortcuts work in iterm and it's good to learn these because arrow keys, home/endkeys and Mac equivalents don't always work. For example ⌘ + Left Arrow is usually the same as Home(go to beginning of current line) but that doesn't work in the shell. Home works in many apps but ittakes you away from the home row.
| Function | Shortcut |
|---|---|
| Move to the start of line | Ctrl + A or Home |
| Move to the end of line | Ctrl + E or End |
| Move forward a word | Option + F |
| Move backward a word | Option + B |
| Set Mark | ⌘ + M |
| Jump to Mark | ⌘ + J |
| Moving by word on a line (this is a shell thing but passes through fine) | Ctrl + Left/Right Arrow |
| Cursor Jump with Mouse (shell and vim - might depend on config) | Option + Left Click |
I don't use this feature too much.
| Function | Shortcut |
|---|---|
| Enter Copy Mode | Shift + ⌘ + C |
| Enter Character Selection Mode in Copy Mode | Ctrl + V |
| Move cursor in Copy Mode | HJKL vim motions or arrow keys |
| Copy text in Copy Mode | Ctrl + K |
Copy actions goes into the normal system clipboard which you can paste like normal.
| Function | Shortcut |
|---|---|
| Search as you type | Ctrl + R and type the search term; Repeat Ctrl + R to loop through result |
| Search the last remembered search term | Ctrl + R twice |
| End the search at current history entry | Ctrl + Y |
| Cancel the search and restore original line | Ctrl + G |
| Function | Shortcut |
|---|---|
Clear the screen/pane (when Ctrl + L won't work) | ⌘ + K (I use this all the time) |
| Broadcast command to all panes in window (nice when needed!) | ⌘ + Alt + I (again to toggle) |
| Find Cursor | ⌘ + /or use a theme or cursor shape that is easy to see |
I have found terminal/shell nirvana on my Mac with mosh + tmux + iTerm2 Tmux Integration, but it wasn't easy.
My dream setup was these 3 running together:
1) mosh: Runs on client and on server. An ssh replacement that is secured with AES-128 and ssh. Virtually indestructible ssh-like sessions that remain 'live' even after you change IP addresses (ie. physical locations), VPNs, or network interfaces. I can login to a server and never need to re-login for *months*. Whenever I open my macbook, my shell sessions are exactly where they were before and ready for the next command. If your IP address changes while you commute (eg. train) or you are on VPN a lot, you really should use mosh instead of ssh. It's not just for unreliable connections, I use mosh everywhere because it saves me time.
2) tmux: Runs on the server. Replacement for the old ‘screen' utility. It allows you to keep active windows (and panes) in a session that remains alive even after you disconnect from the remote server.
3) iTerm2's Tmux Integration: Runs on Mac. Very cool iTerm2 feature that renders your tmux windows as native iTerm2 tabs. Allows you to scroll back through your tmux window with Macbook touchpad gestures and iTerm hotkeys. Supports iTerm2's very quick & capable Cmd-F (Find) instead of tmux's Find. Supports intuitive text selection and advanced text selection (discontiguous select & copy) built into iTerm. Switching between tabs with keyboard shortcuts. Basically everything you can do in iTerm2 regular tabs, you can probably do with your tmux session rendered by iTerm2's Tmux Integration. It rocks.
The problem is iTerm's Tmux integration works fine when using ssh, but not when using mosh.
With this howto, you can build a patched version of mosh (client and server) that is compatible with iTerm's Tmux Integration. Mosh is a small program, so the build is very quick.
Moreover, this howto allows you to try the patched mosh binaries without touching your existing mosh installation. This is done by specifying the ‘–client' and ‘–server' options when running mosh.
Once you are happy with how the patched mosh is working, you can move the patched mosh to a location in your path (need to do this on both client and server).
Note, if you are on wifi all the time, you can use Eternal Terminal instead of this howto. I use hard-wired ethernet at my desk and wifi when I leave my desk (eg. walking to a meeting). It so happens, this switching of network interfaces seems to break Eternal Terminal and close my session (in my testing).
In my setup I have a macbook (mosh client) connecting to an ubuntu 16.04 server (mosh server).
First, we'll build mosh on the Macbook (mosh-client).
Create a directory for the code: https://aznycm.over-blog.com/2021/01/alt-tab-mac.html.
dlee-mbp:~ donn$ mkdir -pv ~/workspace/git/github.com/rledisez/
dlee-mbp:~ donn$ cd ~/workspace/git/github.com/rledisez/
Grab the code:
dlee-mbp:rledisez donn$ git clone https://github.com/rledisez/mosh.git
dlee-mbp:rledisez donn$ cd mosh
Checkout the patched mosh branch called 'localScrollback-1.3.2':
dlee-mbp:mosh donn$ git checkout -b localScrollback-1.3.2 origin/localScrollback-1.3.2
Use Homebrew to install dependencies:
dlee-mbp:mosh donn$ brew install protobuf automake pkg-config
Build patched mosh binaries:
dlee-mbp:mosh donn$ ./autogen.sh
configure.ac:21: installing ‘./ar-lib'
configure.ac:13: installing ‘./compile'
configure.ac:6: installing ‘./install-sh'
configure.ac:6: installing ‘./missing'
src/crypto/Makefile.am: installing ‘./depcomp'
parallel-tests: installing ‘./test-driver'
./configure
make
You don't have to do ‘make install' at this point. You can try the binary without installing it (see below).
But, we also need a patched mosh on the server, so next…
Install debian package dependencies:
Note: Boost (libboost-dev) not needed for mosh 1.2+ so I didn't install it.
sudo apt-get install automake libtool g++ protobuf-compiler libprotobuf-dev libutempter-dev libncurses5-dev zlib1g-dev libio-pty-perl libssl-dev pkg-config
Build mosh-client and mosh-server:
git clone https://github.com/rledisez/mosh.git
cd mosh
git checkout -b localScrollback-1.3.2 origin/localScrollback-1.3.2
./autogen.sh
./configure
make
Again, you don't have to ‘make install' if you just want to try things out.
Locate the path to patched mosh-client on my Macbook:
/Users/donn/workspace/git/github.com/rledisez/mosh/src/frontend/mosh-client
Locate the path to patched mosh-server on my ubuntu server:
/home/donn/workspace/github.com/rledisez/mosh/src/frontend/mosh-server
With this info, I can try my first iTerm + tmux + mosh session:
The ‘mosh' command is found in the ‘scripts' subdirectory of the source code directory.
After logging in to 10.1.1.1, start tmux on remote host: Colibri 1 8 1 – native macos audio player.
remote_host$ tmux -CC
[or ‘tmux -CC a' if resuming an existing tmux session] Imazing 2 9 9.
… and then see iTerm2 window with Tmux Integration enabled. Cmd-T to open a new tab.
Enjoy!
Mac: Just put mosh and mosh-client in your path. To see your installed version of mosh:
Adium all in one messenger for mac macos nmac ked. $ which mosh
$ which mosh-client
To see your path:
$ echo $PATH
Maybe copy your originals as mosh.orig, mosh-client.orig
Ubuntu server: Same thing but with mosh-server. Maybe save your original as mosh-server.orig
From this point forward, be aware that normal, standard mosh clients will not be compatible with patched mosh on the server. If you want to support both, then use the ‘–server' option when starting a mosh session to specify which version of mosh-server will be run on the server (eg. mosh-server or mosh-server.orig).
If your session dies abruptly with an error like the following, it means your mosh-client or your mosh-server is not running the patched version of mosh; it is probably running your normal, installed version of mosh.
iTerm2's Tmux Integration:
Build instructions for mosh:
Patched mosh that supports tmux control-mode (tmux -CC). Original patch by github user 4ast. Rebased on mosh 1.3.2 by rledisez:
At the time of this article, v1.3.2 was the latest stable version for download at mosh.org
Original patched mosh:
Note: Commit d5bd1d31d86d4003705e69f87466aa7e10f9c5b9 'add support for resize events' is already part of mosh mainline.
'tmux integration hangs when logged in with mosh (ok w/ ssh)'
Homebrew package manager for Mac:
Wow bfa blackthorne. Bounty ($$$) for adding tmux control-mode support to mosh:


/image%2F6182196%2F20210214%2Fob_9f9a62_contexts-3-6-1-fast-window-switcher.jpeg)
/image%2F6182196%2F20210214%2Fob_a7c513_copyclip-2-9-96-clipboard-manager.png)
/image%2F6182196%2F20210214%2Fob_1a3083_instabro-5-2-5-browser-for-instagram-p.png)
/image%2F6182196%2F20210214%2Fob_3fcca1_parallels-desktop-13-13-0-1.jpeg)